Bei Headless Systemen (ohne Bildschirm) hat man hin und wieder Probleme mit der Energiesparfunktion des Systems, beispielsweise wenn man AMT verwenden will. Früher hat es gereicht eine 75 Ohm Widerstand in den VGA Port zu stecken, seit Systeme aber nur noch HDMI oder DP haben ist das etwas schwieriger… Dummy Monitor für 2,50€ weiterlesen
Archiv der Kategorie: Homeserver
Postfix Mails mit Domainfactory als Smarthost versenden
Wer würde nicht gerne die Hilferufe seiner Linux Maschine als E-Mail bekommen? Eigentlich ja kein Problem, da viele Web-Frontends wie Webmin oder OpenMediaVault das Konfigurieren sehr leicht machen und es diverse Anleitunge für GMail Acounts gibt. Aber geht das mit jedem Provider? Nein, ein Allgäuer Provider leistet widerstand… Postfix Mails mit Domainfactory als Smarthost versenden weiterlesen
KVM Maschinen nach oVirt importieren
Um existierende KVM Maschinen nach oVirt importieren zu können gibt es ein paar Tricks die man zuvor kennen muss.
Mindestens ein oVirt-Engine benötigt eine public key authentication zum Rechner auf denen die KVM Maschinen liegen.
Um für den vdsm Benutzer eine diese einrichten zu können benötigt dieser zunächst ein home Verzeichnis und einen Eintrag in der /etc/passwd wo das home liegt
# mkdir /home/vdsm
# chown -R vdsm /home/vdsm
# vi /etc/passwd

vdsm:x:36:36:Node Virtualization Manager:/home/vdsm:/sbin/nologin
Nun kann die Authentifizierung eingerichtet werden:
# sudo -u vdsm ssh-keygen
# sudo -u vdsm ssh-copy-id root@<kvm-server>
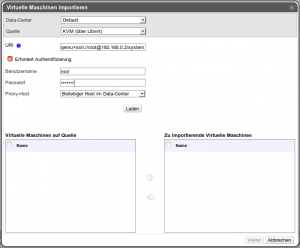
Nun kann unter „System > Data-Center > Cluster > Default > VMs > Import“ mit dem Import begonnen werden.
Und dann bekommt man einen Fehler .. voraussichtlicher BugFix in oVirt 4.1 🙁
Aktuell bleibt also nur der Weg eine identische VM über oVirt anzulegen und den Inhalt des alten Festplattenimages mittels dd in das neue leere oVirt Image zu übertragen:
# dd if=<old kvm image > of=<oVirt generated image> bs=4MB
oVirt legt die Images im entsprechenden NFS Export Verzeichnissen ab.
oVirt mit virt-manager bedienen
Um virt-manager mit der oVirt Installation verwenden zu können benötigt man noch folgende Regel-Datei. Zugriffsrechte für Gruppen können mit unix-group:<gruppenname> und für Benutzer mit unix-user vergeben werden.
vi /etc/polkit-1/localauthority/50-local.d/50-org.example-libvirt-remote-access.pkla

[Remote libvirt SSH access]
Identity=unix-user:myuser
Action=org.libvirt.unix.manage
ResultAny=yes
ResultInactive=yes
ResultActive=yes
nach muss auf dem oVirt System noch der Benutzer mit Passwort versehen werden.
# saslpasswd2 -a libvirt myuser
oVirt 4 einrichten
Im folgenden Teil wird erklärt wie oVirt eingerichtet werden kann.
Zunächst muss die Paketquelle hinzugefügt werden:
# yum install http://resources.ovirt.org/pub/yum-repo/ovirt-release40.rpm
Danach müssen die benötigten Softwarepakete installiert werden:
# yum install ovirt-engine -y
Im Anschluss kann mit engine-setup das Installationsprogramm gestartet werden.
# engine-setup
[ INFO  ] Stage: Initializing
[ INFO  ] Stage: Environment setup
          Configuration files: ['/etc/ovirt-engine-setup.conf.d/10-packaging-jboss.conf', '/etc/ovirt-engine-setup.conf.d/10-packaging.conf']
          Log file: /var/log/ovirt-engine/setup/ovirt-engine-setup-20170107120457-5krvyd.log
          Version: otopi-1.5.2 (otopi-1.5.2-1.el7.centos)
[ INFO  ] Stage: Environment packages setup
[ INFO  ] Stage: Programs detection
[ INFO  ] Stage: Environment setup
[ INFO  ] Stage: Environment customization

          --== PRODUCT OPTIONS ==--

          Configure Engine on this host (Yes, No) [Yes]:
          Configure Image I/O Proxy on this host? (Yes, No) [Yes]:
          Configure WebSocket Proxy on this host (Yes, No) [Yes]:
          Please note: Data Warehouse is required for the engine. If you choose to not configure it on this host, you have to configure it on a remote host, and then configure the engine on this host so that it can access the database of the remote Data Warehouse host.
          Configure Data Warehouse on this host (Yes, No) [Yes]:
          Configure VM Console Proxy on this host (Yes, No) [Yes]:

          --== PACKAGES ==--

[ INFO  ] Checking for product updates...
[ INFO  ] No product updates found

          --== NETWORK CONFIGURATION ==--

          Host fully qualified DNS name of this server [vmnode1.skys.local]:
[WARNING] Failed to resolve vmnode1.skys.local using DNS, it can be resolved only locally
          Setup can automatically configure the firewall on this system.
          Note: automatic configuration of the firewall may overwrite current settings.
          Do you want Setup to configure the firewall? (Yes, No) [Yes]: No

          --== DATABASE CONFIGURATION ==--

          Where is the DWH database located? (Local, Remote) [Local]:
          Setup can configure the local postgresql server automatically for the DWH to run. This may conflict with existing applications.
          Would you like Setup to automatically configure postgresql and create DWH database, or prefer to perform that manually? (Automatic, Manual) [Automatic]:
          Where is the Engine database located? (Local, Remote) [Local]:
          Setup can configure the local postgresql server automatically for the engine to run. This may conflict with existing applications.
          Would you like Setup to automatically configure postgresql and create Engine database, or prefer to perform that manually? (Automatic, Manual) [Automatic]:

          --== OVIRT ENGINE CONFIGURATION ==--

          Engine admin password:
          Confirm engine admin password:
[WARNING] Password is weak: Es ist zu kurz
          Use weak password? (Yes, No) [No]: Yes
          Application mode (Virt, Gluster, Both) [Both]:

          --== STORAGE CONFIGURATION ==--

          Default SAN wipe after delete (Yes, No) [No]:

          --== PKI CONFIGURATION ==--

          Organization name for certificate [skys.local]:

          --== APACHE CONFIGURATION ==--

          Setup can configure the default page of the web server to present the application home page. This may conflict with existing applications.
          Do you wish to set the application as the default page of the web server? (Yes, No) [Yes]:
          Setup can configure apache to use SSL using a certificate issued from the internal CA.
          Do you wish Setup to configure that, or prefer to perform that manually? (Automatic, Manual) [Automatic]:

          --== SYSTEM CONFIGURATION ==--

          Configure an NFS share on this server to be used as an ISO Domain? (Yes, No) [No]:

          --== MISC CONFIGURATION ==--

          Please choose Data Warehouse sampling scale:
          (1) Basic
          (2) Full
          (1, 2)[1]:

          --== END OF CONFIGURATION ==--

[ INFO  ] Stage: Setup validation

          --== CONFIGURATION PREVIEW ==--

          Application mode                        : both
          Default SAN wipe after delete           : False
          Update Firewall                         : False
          Host FQDN                               : vmnode1.skys.local
          Engine database secured connection      : False
          Engine database host                    : localhost
          Engine database user name               : engine
          Engine database name                    : engine
          Engine database port                    : 5432
          Engine database host name validation    : False
          DWH database secured connection         : False
          DWH database host                       : localhost
          DWH database user name                  : ovirt_engine_history
          DWH database name                       : ovirt_engine_history
          DWH database port                       : 5432
          DWH database host name validation       : False
          Engine installation                     : True
          PKI organization                        : skys.local
          Configure local Engine database         : True
          Set application as default page         : True
          Configure Apache SSL                    : True
          DWH installation                        : True
          Configure local DWH database            : True
          Engine Host FQDN                        : vmnode1.skys.local
          Configure Image I/O Proxy               : True
          Configure VMConsole Proxy               : True
          Configure WebSocket Proxy               : True

          Please confirm installation settings (OK, Cancel) [OK]:
[ INFO  ] Stage: Transaction setup
[ INFO  ] Stopping engine service
[ INFO  ] Stopping ovirt-fence-kdump-listener service
[ INFO  ] Stopping dwh service
[ INFO  ] Stopping Image I/O Proxy service
[ INFO  ] Stopping websocket-proxy service
[ INFO  ] Stage: Misc configuration
[ INFO  ] Stage: Package installation
[ INFO  ] Stage: Misc configuration
[ INFO  ] Upgrading CA
[ INFO  ] Initializing PostgreSQL
[ INFO  ] Creating PostgreSQL 'engine' database
[ INFO  ] Configuring PostgreSQL
[ INFO  ] Creating PostgreSQL 'ovirt_engine_history' database
[ INFO  ] Configuring PostgreSQL
[ INFO  ] Creating CA
[ INFO  ] Creating/refreshing Engine database schema
[ INFO  ] Creating/refreshing DWH database schema
[ INFO  ] Configuring Image I/O Proxy
[ INFO  ] Setting up ovirt-vmconsole proxy helper PKI artifacts
[ INFO  ] Setting up ovirt-vmconsole SSH PKI artifacts
[ INFO  ] Configuring WebSocket Proxy
[ INFO  ] Creating/refreshing Engine 'internal' domain database schema
[ INFO  ] Generating post install configuration file '/etc/ovirt-engine-setup.conf.d/20-setup-ovirt-post.conf'
[ INFO  ] Stage: Transaction commit
[ INFO  ] Stage: Closing up
[ INFO  ] Starting engine service
[ INFO  ] Starting dwh service
[ INFO  ] Restarting ovirt-vmconsole proxy service

          --== SUMMARY ==--

[ INFO  ] Restarting httpd
          In order to configure firewalld, copy the files from
              /etc/ovirt-engine/firewalld to /etc/firewalld/services
              and execute the following commands:
              firewall-cmd --permanent --add-service ovirt-postgres
              firewall-cmd --permanent --add-service ovirt-https
              firewall-cmd --permanent --add-service ovirt-fence-kdump-listener
              firewall-cmd --permanent --add-service ovirt-imageio-proxy
              firewall-cmd --permanent --add-service ovirt-websocket-proxy
              firewall-cmd --permanent --add-service ovirt-http
              firewall-cmd --permanent --add-service ovirt-vmconsole-proxy
              firewall-cmd --reload
          The following network ports should be opened:
              tcp:2222
              tcp:443
              tcp:5432
              tcp:54323
              tcp:6100
              tcp:80
              udp:7410
          An example of the required configuration for iptables can be found at:
              /etc/ovirt-engine/iptables.example
          Please use the user 'admin@internal' and password specified in order to login
          Web access is enabled at:
              http://vmnode1.skys.local:80/ovirt-engine
              https://vmnode1.skys.local:443/ovirt-engine
          Internal CA D4:C8:59:3F:54:CD:26:4E:5C:97:5A:59:E4:1B:8A:DB:47:96:06:49
          SSH fingerprint: cf:bd:ba:bb:d8:5c:92:8e:9e:50:1d:80:a7:cf:f5:d7

          --== END OF SUMMARY ==--

[ INFO  ] Stage: Clean up
          Log file is located at /var/log/ovirt-engine/setup/ovirt-engine-setup-20170107120457-5krvyd.log
[ INFO  ] Generating answer file '/var/lib/ovirt-engine/setup/answers/20170107122105-setup.conf'
[ INFO  ] Stage: Pre-termination
[ INFO  ] Stage: Termination
[ INFO  ] Execution of setup completed successfully
Wenn die Firewall aktiviert ist muss man noch die oben aufgelisteten Aktionen durchführen.
Wenn SPICE von extern verwendet werden können soll muss noch folgende Regel hinzugefügt werden:
# firewall-cmd --permanent --add-port 5634-6166/tcp
Danach kann man sich am Webportal über die 2 ausgegebenen Adressen verbinden und einloggen.
Zunächst muss der lokale Host hinzu gefügt werden:
“System -> Data Centers -> Default -> Clusters -> Default -> Hosts -> New”
Die erfolgt über die Angabe von Namen IP und root Passwort.
Der Installationsprozess kann eine weile dauern.
NFS Exports erstellen:
# vi /etc/exports
/mnt/raid6/exports/isos         vmnode1(rw,sync,no_subtree_check,all_squash,anonuid=36,anongid=36)
/mnt/raid6/exports/data         vmnode1(rw,sync,no_subtree_check,all_squash,anonuid=36,anongid=36)
Nach müssen die shares neu geladen werden und die Berechtigungen für oVirt angepasst werden:
# exportfs -a
# chown -R vdsm:kvm /mnt/raid6/exports
# chown -R vdsm:kvm /mnt/raid6/exports
Im Anschluss kann der NFS Server aktiviert und gestartet werden:
# systemctl start {nfs-server,nfs-lock,nfs-idmap}
# systemctl enable {nfs-server,nfs-lock,nfs-idmap}
Created symlink from /etc/systemd/system/multi-user.target.wants/nfs-server.service to /usr/lib/systemd/system/nfs-server.service.
Da oVirt noch NFS3 als Standard Version verwendet empfiehlt es sich NFS in der /etc/nfsmount.conf wie folgt zu konfigurieren:
[ NFSMount_Global_Options ]
# This statically named section defines global mount
# options that can be applied on all NFS mount.
#
# Protocol Version [2,3,4]
# This defines the default protocol version which will
# be used to start the negotiation with the server.
Defaultvers=3
#
# Setting this option makes it mandatory the server supports the
# given version. The mount will fail if the given version is
# not support by the server.
Nfsvers=3
Nach dem die Speicherplätze verfügbar sind können diese in oVirt eingehangen werden:
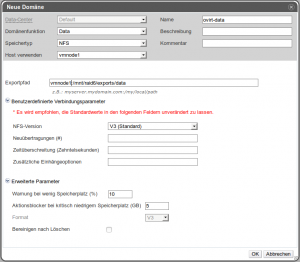
„System -> Data Centers -> Default -> Storage -> New Domain“:
Nun ist oVirt bereit für die Verwendung
Raid6 in Linux über die Konsole erstellen
In diesem Abschnitt befassen wir uns mit erstellen eine Raid6 über die Linux Konsole.
Voraussetzungen:
– mindestens 4 Festplatten
– etwas Rechenleistung für das Softraid (mdadm)
Vorteile:
– hohe Datensicherheit: da bis zu 2 Festplatten gleichzeitig ausfallen können ohne Daten zu verlieren
Nachteile:
– man verschenkt etwas Festplattenplatz (2 Festplatten werden für Paritydaten benutzt) und stehen nicht für Daten zur Verfügung. Bei Raids mit mehr als 4 Platten relativiert sich der Nachteil aber schnell.
Installation von mdadm:
yum install mdadm              [RedHat]
apt-get install mdadm          [Debian]
Nach der Installation müssen die Festplatten ausgewählt werden, welche als Raid verbunden werden sollen. Um die Laufwerkszuordung anzuzeigen verwedet man am besten:
# fdisk -l | grep sd
Disk /dev/sda: 3000.6 GB, 3000592982016 bytes, 5860533168 sectors
Disk /dev/sdc: 3000.6 GB, 3000592982016 bytes, 5860533168 sectors
Disk /dev/sdd: 3000.6 GB, 3000592982016 bytes, 5860533168 sectors
Disk /dev/sde: 3000.6 GB, 3000592982016 bytes, 5860533168 sectors
Disk /dev/sdb: 3000.6 GB, 3000592982016 bytes, 5860533168 sectors
Disk /dev/sdf: 256.1 GB, 256060514304 bytes, 500118192 sectors
In diesem Fall verwenden wir die Laufwerke /dev/sda bis / dev/sde
Um zu prüfen, ob eine der Platten zu einem Raid gehört kann man mdadm –examine (-E) ausführen:
# mdadm -E /dev/sd[a-e]
mdadm: No md superblock detected on /dev/sda.
mdadm: No md superblock detected on /dev/sdb.
mdadm: No md superblock detected on /dev/sdc.
mdadm: No md superblock detected on /dev/sdd.
mdadm: No md superblock detected on /dev/sde.
Wird kein superblock gefunden ist alles sauber und man kann weiter machen.
Nun müssen die Laufwerke partitioniert werden:
# fdisk /dev/sda
Welcome to fdisk (util-linux 2.23.2).

Changes will remain in memory only, until you decide to write them.
Be careful before using the write command.

Device does not contain a recognized partition table
Building a new DOS disklabel with disk identifier 0x57755548.

WARNING: The size of this disk is 3.0 TB (3000592982016 bytes).
DOS partition table format can not be used on drives for volumes
larger than (2199023255040 bytes) for 512-byte sectors. Use parted(1) and GUID
partition table format (GPT).


The device presents a logical sector size that is smaller than
the physical sector size. Aligning to a physical sector (or optimal
I/O) size boundary is recommended, or performance may be impacted.

Befehl (m für Hilfe): n
Partition type:
   p   primary (0 primary, 0 extended, 4 free)
   e   Erweiterte
Select (default p): p
Partitionsnummer (1-4, default 1): 1
Erster Sektor (2048-4294967295, Vorgabe: 2048):
Benutze den Standardwert 2048
Last Sektor, +Sektoren or +size{K,M,G} (2048-4294967294, Vorgabe: 4294967294):
Benutze den Standardwert 4294967294
Partition 1 of type Linux and of size 2 TiB is set

Befehl (m für Hilfe): t
Selected partition 1
Hex code (type L to list all codes): fd
Changed type of partition 'Linux' to 'Linux raid autodetect'

Befehl (m für Hilfe): p

Disk /dev/sda: 3000.6 GB, 3000592982016 bytes, 5860533168 sectors
Units = Sektoren of 1 * 512 = 512 bytes
Sector size (logical/physical): 512 bytes / 4096 bytes
I/O size (minimum/optimal): 4096 bytes / 4096 bytes
Disk label type: dos
Disk identifier: 0x57755548

   Gerät  boot.     Anfang        Ende     Blöcke   Id  System
/dev/sda1            2048  4294967294  2147482623+  fd  Linux raid autodetect

Befehl (m für Hilfe): w
Die Partitionstabelle wurde verändert!

Rufe ioctl() um Partitionstabelle neu einzulesen.
Synchronisiere Platten.
Das muss mit allen Festplatten durchgeführt werden.
Anschließend kann dann das Raid erzeugt werden:
#  mdadm --create /dev/md0 --level=6 --raid-devices=5 /dev/sda1 /dev/sdb1 /dev/sdc1 /dev/sdd1 /dev/sde1
mdadm: Defaulting to version 1.2 metadata
mdadm: array /dev/md0 started.
Der Bereitstellungsprozess dauert je nach Festplattenanzahl und Größe mehrere Stunden.
Den Status kann man mit folgendem Befehl beobachten:
# watch -n 1 cat /proc/mdstat
Every 1,0s: cat /proc/mdstat                                                                            Fri Jan  6 16:31:45 2017

Personalities : [raid6] [raid5] [raid4]
md0 : active raid6 sde1[4] sdd1[3] sdc1[2] sdb1[1] sda1[0]
      6442053120 blocks super 1.2 level 6, 512k chunk, algorithm 2 [5/5] [UUUUU]
      [=====>...............]  resync = 26.8% (576457508/2147351040) finish=195.0min speed=134255K/sec
      bitmap: 12/16 pages [48KB], 65536KB chunk

unused devices: <none>
Nach dem das Raid synchronisiert ist kann man sich den Zustand mit folgendem Befehl anzeigen lassen:
# mdadm --detail /dev/md0                                                                                   :(
/dev/md0:
        Version : 1.2
  Creation Time : Fri Jan  6 15:22:54 2017
     Raid Level : raid6
     Array Size : 6442053120 (6143.62 GiB 6596.66 GB)
  Used Dev Size : 2147351040 (2047.87 GiB 2198.89 GB)
   Raid Devices : 5
  Total Devices : 5
    Persistence : Superblock is persistent

  Intent Bitmap : Internal

    Update Time : Fri Jan  6 20:19:54 2017
          State : clean
 Active Devices : 5
Working Devices : 5
 Failed Devices : 0
  Spare Devices : 0

         Layout : left-symmetric
     Chunk Size : 512K

           Name : localhost.local:0  (local to host localhost.local)
           UUID : 7a7b49b9:ebaf805a:a9ec676c:d6c31c13
         Events : 3224

    Number   Major   Minor   RaidDevice State
       0       8        1        0      active sync   /dev/sda1
       1       8       17        1      active sync   /dev/sdb1
       2       8       33        2      active sync   /dev/sdc1
       3       8       49        3      active sync   /dev/sdd1
       4       8       65        4      active sync   /dev/sde1
Als nächstes muss das Raid mit einem Dateisystem formatiert werden. Hier bietet sich für Raids z.B. xfs an.
# mkfs.xfs /dev/md0
meta-data=/dev/md0               isize=512    agcount=32, agsize=50328448 blks
         =                       sectsz=4096  attr=2, projid32bit=1
         =                       crc=1        finobt=0, sparse=0
data     =                       bsize=4096   blocks=1610510336, imaxpct=5
         =                       sunit=128    swidth=384 blks
naming   =version 2              bsize=4096   ascii-ci=0 ftype=1
log      =Internes Protokoll     bsize=4096   blocks=521728, version=2
         =                       sectsz=4096  sunit=1 blks, lazy-count=1
realtime =keine                  extsz=4096   blocks=0, rtextents=0
Anschließend muss man das Raid im Dateisystem einhängen:
# mkdir /mnt/raid6
# mount /dev/md0 /mnt/raid6/
Wenn es funktioniert sollte man noch das automatische Einhängen einrichten:
# vi /etc/fstab

/dev/md0 /mnt/raid6 xfs defaults,nobootwait,nofail 0 0
! Wichtig ! hierbei sind die Optionen nobootwait,nofail welche dafür sorgen, dass das System auch noch startet wenn das RAID mal in einen Fehlerzustand kommt. Sonst hat man nur noch die Möglichkeit an der lokalen Konsole das System zu reparieren.
Ob die Konfiguration richtig ist lässt sich mit mount -av testen:
mount -av
/                        : ignored
/boot                    : already mounted
/home                    : already mounted
swap                     : ignored
/mnt/raid6               : already mounted
Zu guter Letzt muss noch die Konfiguration des Raids gespeichert werden:
# mkdir /etc/mdadm          [if it does not already exist]
# mdadm --detail --scan --verbose >> /etc/mdadm/mdadm.conf
# cat /etc/mdadm.conf
ARRAY /dev/md0 level=raid6 num-devices=5 metadata=1.2 name=localhost.local:0 UUID=7a7b49b9:ebaf805a:a9ec676c:d6c31c13
   devices=/dev/sda1,/dev/sdb1,/dev/sdc1,/dev/sdd1,/dev/sde1
Um über Probleme mit dem Raid informiert zu werden kann man sich von mdadm Mails senden lassen.
Hierfür müssen /etc/mdadm/mdadm.conf noch die folgenden Einträge hinzugefügt werden:
MAILADDR <receivers mail address>
MAILFROM <senders mail address>
Anschließend kann mit der Installation von oVirt begonnen werden. Weiter
Projekt Homeserver
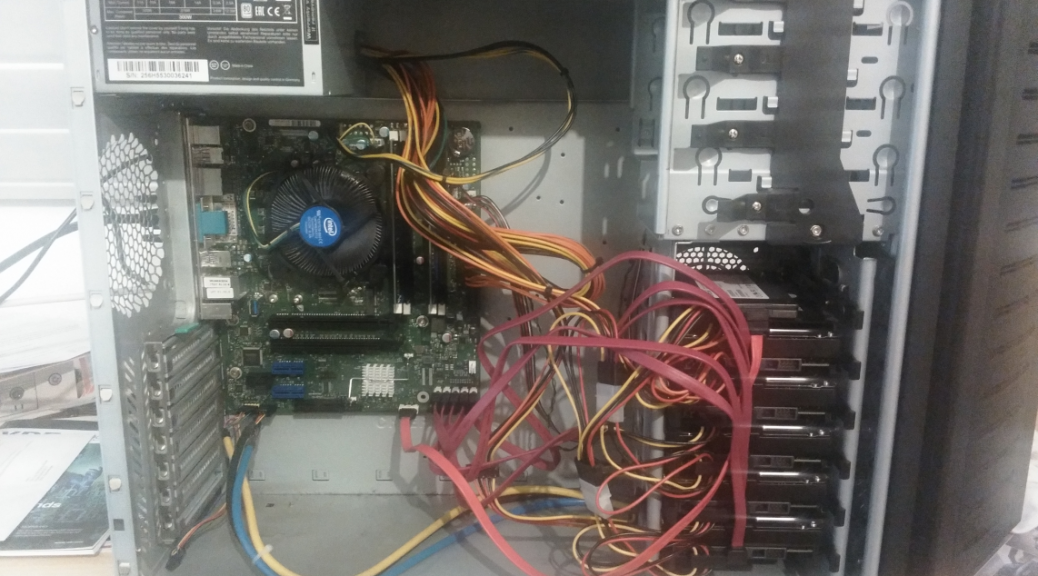
Was wäre das moderne Geek-Home ohne divers Rechner für die verschiedensten Funktionen wie NAS, Kommunikationsserver, diverse Testsysteme mit unterschiedlichen Betriebssystemen… um das Ganze etwas zu konsolidieren bietet sich ein Homeserver an. In den nächsten Artikeln werden die Schritte beschrieben die benötigt werden um so ein System auszusetzen… Projekt Homeserver weiterlesen


